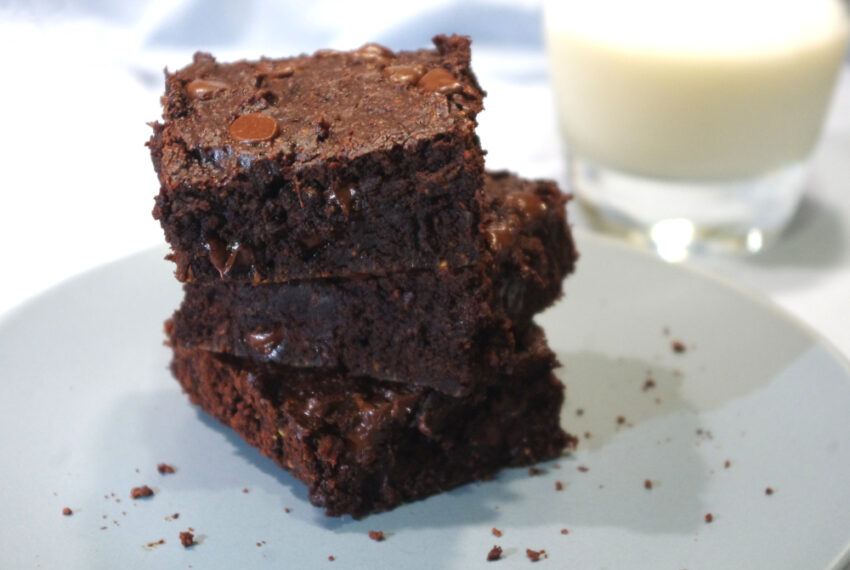
Wholesome Brownies (Small Batch)

Brownies are the bomb, but they do tend to be an empty-calorie sort of bomb. Sometimes, that’s perfectly fine, sure, but wouldn’t it be nice to make them more often without sacrificing all of your dietary principles? Though not low-calorie, these wholesome brownies are almost entirely made from whole foods, which means the calories aren’t empty at all, but rife with nutrients and fiber. In fact, the only added fat or sugar in the recipe is the modest handful of chocolate chips stirred into the batter before baking.

These brownies also happen to be dairy free and they work very well with oat flour, if you want them to be gluten free too. Despite all of this non-traditionalism, they’re fudgy, sweet, deeply chocolatey, and easy to make. This small-batch recipe is here for you any time you need some chocolate in your life, and don’t want to worry about accidentally eating 15 brownies by yourself.

Note: you will need a food processor.

Inspired by, but significantly modified from, this recipe at Paleo Gluten Free Eats.

Ingredients
Makes 6 brownies

  • 100g raw sweet potato (around 1/2 a small potato)
  • 60g pitted medjool dates (about 1/4 cup, packed)
  • 6 tbsp natural almond butter (by “natural”, I mean no added oil or sugar. peanut butter is also good here.)
  • 1 egg
  • 2 tsp vanilla extract
  • 1/2 tsp almond extract
  • 1/3 cup whole wheat or whole oat flour
  • 1/3 cup unsweetened dutch cocoa
  • 1/2 tsp baking powder
  • 2 tbsp granulated erythritol (you can sub sugar if you prefer)
  • 1/2 tsp instant coffee granules (optional)
  • 1/4 tsp salt (reduce to a pinch or two if your nut butter is salted)
  • 1/4 cup semi-sweet chocolate chips

Preheat the oven to 325 F. Thoroughly grease 8×4″ loaf pan or a 6×6″ square baking pan, or line it with parchment paper. Chop the dates and pour boiling hot water over them. Let soak for about 10 minutes.

Wash the sweet potato and cut into chunks. No need to peel it. Put the chunks into the bowl of a food processor and pulse repeatedly until minced (think sweet potato meal, but not sweet potato puree!). Drain the dates and add them to the potato. Pulse a few times to help cool the dates down. Add the eggs, nut butter, and extracts and blend until smooth. Add all remaining ingredients, except chocolate chips, and pulse until well combined.

Remove the blade from the food processor bowl, or transfer batter to another bowl, and stir in the chocolate chips. If you like, you can save a few of them to decorate the top of the brownies. Or not. Transfer the batter to your prepared pan and spread into an even layer. Press in any reserved chocolate chips, and bake for 25 minutes.

Allow the brownies to cool in the pan for 10 minutes to set, and then run a knife or rigid spatula around the edge of the pan. Flip the brownies out, or use the edges of the parchment to lift them out, and cut into 6 pieces. These wholesome brownies are great warm out of the oven, and they’re even better the next day when they’ve gotten nice and fudgy.

Once they’re cooled to room temp, store them in an airtight container on the counter. If you wind up keeping them more than a couple days, store in the fridge.

Notes on scaling up: I find these always turn out better as a single small batch, because they’re more uniformly cooked. However, if you wish to double this recipe, use an 7×11 inch pan or an 8 inch square pan. You may have to transfer the batter to a separate bowl to stir in the chocolate chips, unless your food processor is very large. Bake for an additional 3-4 minutes.

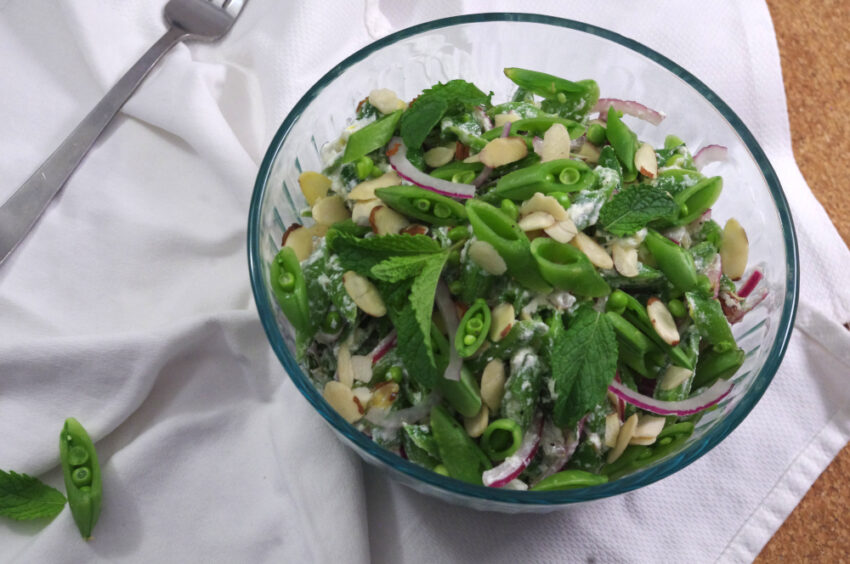
Snap Pea & Ricotta Salad

On those hot summer days, I am loathe to eat hot food. Or make it. Fortunately, my salad game has progressed significantly in the last few years, and this sugar snap pea & ricotta salad is now one of my go-to summer dinner recipes. It’s fresh and unique, and has enough cheese and nuts to give it enough staying power to call itself a proper meal. The slicing is the only significant labor involved, which is also a big plus. It would also make a fancy starter for a summery party.

Adapted slightly from Ivan Conill via Food & Wine.

Ingredients
Serves about 3 as a meal or 5-6 as a side.

For the dressing

  • 1/4 cup olive oil (preferably unfiltered, but any will do)
  • 1/4 cup white wine or rice vinegar
  • 2 tsp lemon zest (about 1 medium lemon)
  • 2 tbsp lemon juice (about half the medium lemon)
  • 1 tsp honey
  • 1 tsp salt (or to taste)
  • 1/2 tsp freshly ground black pepper (or to taste)
  • 2 tsp minced shallot (optional)

For the salad

  • 1 lb sugar snap peas
  • 1/2 a medium red onion (about 1/2 cup, thinly sliced)
  • A generous 1/2 cup fresh mint leaves (less than a 1 oz package of mostly leaves, or a medium bunch if there are a lot of stems)
  • 1 cup ricotta cheese
  • 1/2 cup toasted sliced almonds

Wash and dry the lemon before zesting it. Combine all dressing ingredients in a small bowl and whisk well. Set aside.

Cut the onion half in half again and slice thinly. Rinse the sliced onion in cold water and then drain it well (I just set the colander aside to drain while I prep the rest of the ingredients, and shake it every once in a while, but you could also pat them dry with a clean towel).

Wash the peas and trim off any stems/leaves/tendrils. Slice the snap peas diagonally (aiming for 3-5 slices per pea, depending on size). The diagonal part is largely for presentation, but slicing the peas somehow is important to make them bite sized and create lots of nooks and crannies for the dressing and ricotta to fill. You can toss them straight into a large bowl.

Wash the mint, remove and discard the stems, and tear the leaves into bite sized pieces. Add to large bowl. Add the drained/dried onion to the bowl along with the almonds and the ricotta. Whisk the dressing one more time and pour it over everything. Use a large spoon or a spatula to stir the salad up until the ricotta is fairly well distributed and you’re done!

Snap pea & ricotta salad is best eaten the same day, but left overs are still pretty good for a day or two afterwards, (unlike a traditional leafy salad).


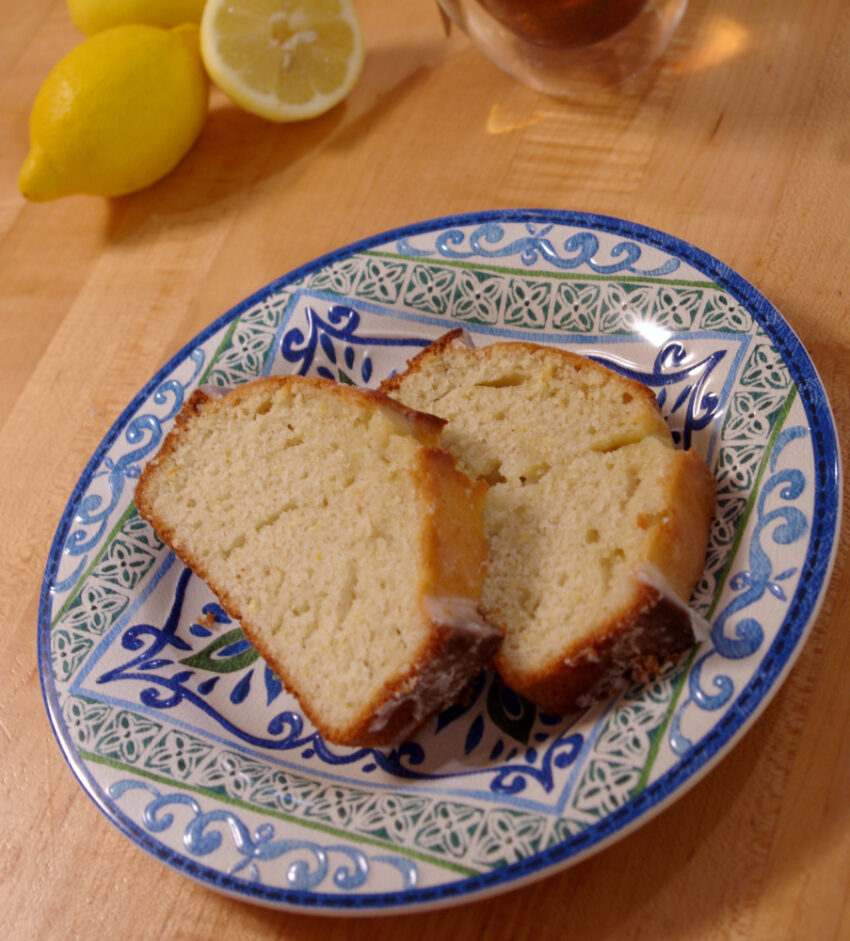
Sourdough Discard Lemon Loaf Cake

sourdough discard lemon loaf cake

This tender sourdough discard lemon loaf cake is a delightful way to put some extra sourdough starter to use, and does not require overnight resting (only an hour!). A luscious lemon sweet bread that retains only a subtle sourdough flavor, if any, and has a delicate crumb. The glaze isn’t required to make it worth your time, but adds a little to the luxury.

Ingredients
Makes 1 9″ loaf (about 10 slices)

  • 1/4 cup butter (half a stick), softened
  • 3/4 cup sugar
  • 2 eggs
  • 1 tsp vanilla
  • zest of 2 lemons
  • 3 tbsp vegetable oil
  • 1/2 cup water or milk of choice
  • 1 1/4 cup flour
  • 1 tsp salt
  • 1 tsp baking powder
  • 1/2 cup sourdough starter, fed the previous day

Optional glaze:

  • 2 tbsp butter
  • 1 cup confectioner’s sugar
  • juice of one lemon (if it’s a very large lemon, add a little less)

For the cake:

In a medium bowl, cream the butter and sugar with an electric mixer. Add one egg and mix until fluffy. Then add the second egg, along with the vanilla and lemon zest and mix for a few seconds. Add the oil and milk or water and mix until combined, starting on low speed to avoid splashing. Measure in the dry ingredients and starter and mix until batter looks uniform and there are no lumps, but not beyond that point.

Grease and flour a loaf pan, and use a spatula to scrape all the batter into the pan. Cover and refrigerate for for at least 1 hour.

Preheat oven to 350 F (175 C). Remove covering from loaf pan and place in the center of the middle rack. Bake for 50-60 minutes until a knife or skewer inserted into the middle comes out without any uncooked batter on it.

Tip loaf out of pan and place on a wire rack or wood cutting board to cool for at least 15 minutes before slicing. If glazing, let sit until almost completely cool, and then replace in pan.

For the glaze:

In a small microwave safe bowl, melt the butter. Add the confectioner’s sugar and lemon juice and use a small whisk or a fork to stir until there are no lumps. Pour the glaze evenly along the center of the loaf and allow to sit until it sets (it will still be soft). Run a spatula along the edge of the pan and carefully remove the loaf.

Use a serrated knife to cut into slices about 1 inch thick and serve. Now enjoy your sourdough discard lemon loaf cake, and that extra space you’ve regained in your starter jar! The cake keeps well in an airtight container on the counter for a couple days.

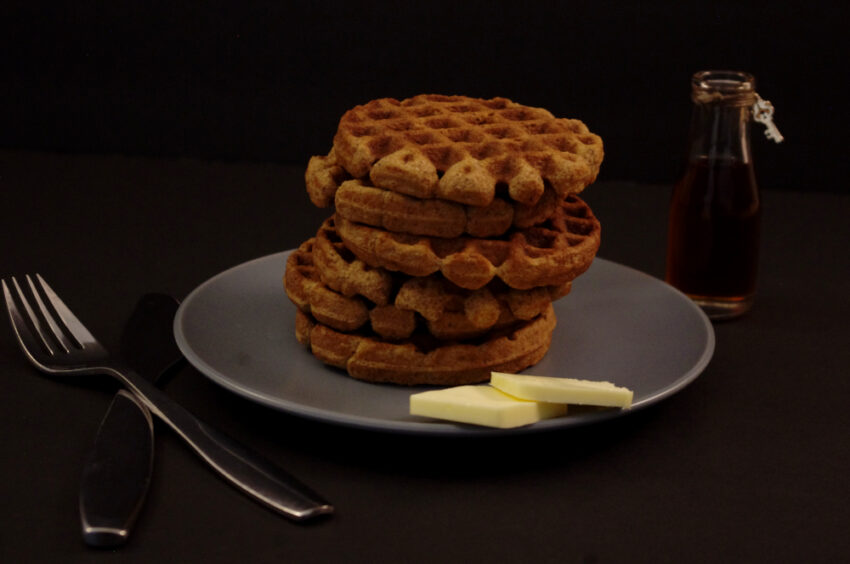
Low-Carb Waffles (that don’t suck)

I’ve tried many a recipe for keto and low-carb waffles off the internet and they’ve been…well…okay, I guess. But they all share certain characteristics which I find sub-optimal. They were invariably eggy, and either floppy and spongy, or so dry and dense that they sucked all moisture out of your mouth. And maybe it was my imagination, but somehow, sometimes, both at once…? So, after several of these lackluster experiences, I set out to make my own low-carb waffles. The result are these beauties. They’re fluffy and hold their shape without being dry.

Note that you will need an electric mixer (hand or stand is fine) and a food processor.

Ingredients
Makes about a dozen mini-waffles, or (probably) half as many large ones.

  • About 1 cup raw pecans (to make 1 cup pecan meal)
  • 3 tbsp coconut flour
  • 2 tbsp oat fiber
  • 1 tbsp wheat gluten
  • 2 tbsp 1-to-1 sugar substitute of choice
  • 1/2 tsp baking powder
  • 1/2 tsp baking soda
  • 1/2 tsp cinnamon
  • 1/2 cup unsweetened almond milk OR 1/4 cup heavy cream and 1/4 cup + 2 tbsp water (the cream option results in a slightly crispier exterior)
  • 1 tsp vanilla
  • 1/2 tsp almond extract
  • 3 eggs
  • Pinch cream of tartar
  • 1 tbsp butter or coconut oil

To make the pecan meal, pulse the pecans in a food processor until they’re a crumbly, sandy texture. If you find yourself making these often, you can do up several cups of pecans ahead and freeze in an airtight container until you’re ready to make waffles. Just make sure you thaw the pecan meal in the fridge overnight, or it’ll be very difficult to work with.

After folding in the egg whites

In a medium bowl, whisk together 1 cup pecan meal and other dry ingredients (except cream of tartar). Add the almond milk/water and cream and the extracts. Separate the eggs, placing the whites into a second medium bowl, and the yolks into the pecan mixture. Whisk the pecan mixture thoroughly and set aside.

Add a pinch of cream of tartar to the bowl with the egg whites and use an electric mixer to beat at high speed until stiff peaks form. Fold the egg whites into pecan mixture until there are no more large lumps/pockets of egg white. It is ok if the mixture is a little streaky still, that is better than over mixing and knocking out all the air.

Melt the butter or coconut oil. Preheat your waffle maker and then lightly brush with butter/oil. Fill the waffle maker about 1/2 or 2/3 of the way with batter and close. Cook until nicely browned (a little longer than just “done” if you want them a lil’ bit crispy). Repeat with remain batter and serve the waffles with butter and/or keto-friendly syrup.

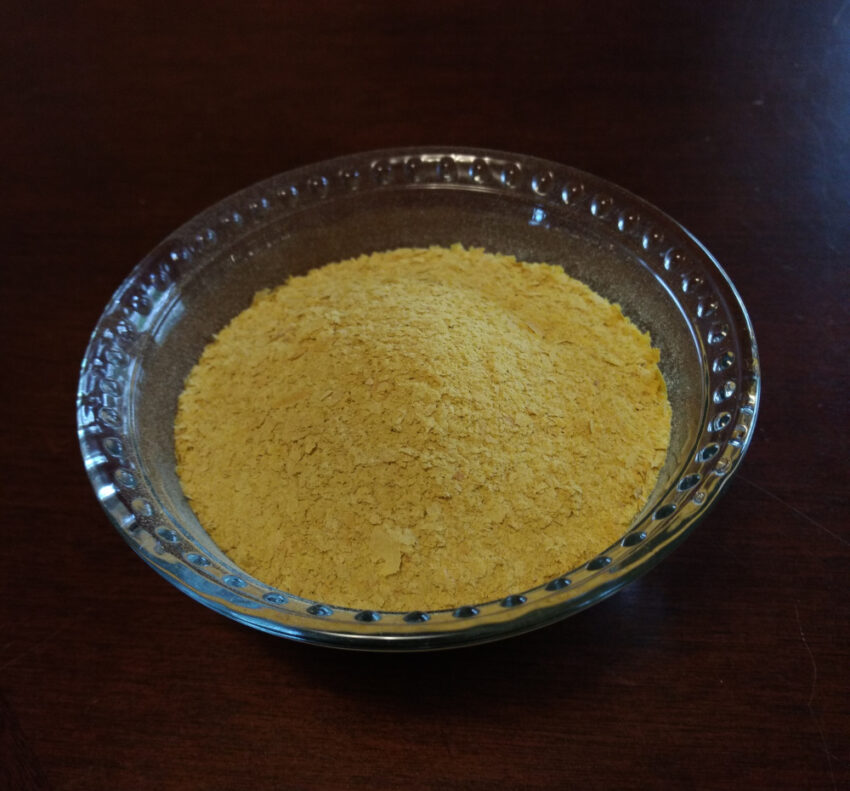
Nutritional Yeast (aka Nooch)

nutritional yeast flakes

Nutritional yeast, unlike other yeasts used to brew or bake, is dead (i.e. inactive). It kinda sounds like a weird thing to eat, but it actually has a wonderful savory umami flavor. Plus, among other nutrients, it contains essential amino acids and is usually fortified with B vitamins.

Uses

Nutritional yeast can be incorporated into sauces, soups, and other savory dishes for flavor, or even sprinkled directly on top of finished foods like baked potatoes or popcorn. It’s also often used in vegetarian and vegan cooking to simulate or replace cheesy, eggy, or chicken-like flavors, such as in this vegan “chicken” soup.

Important notes

Nutritional yeast is usually sold either as flakes (pictured above) or as a powder. It’s the same stuff, but measures differently because flaked has so much more air space due to it’s chunky shape. If subbing powdered for flaked, use about half as much as the recipe calls for. If subbing flaked for powdered, us about twice as much as the recipe calls for.

A helpful tip when working with nooch (especially powdered) is to try not to inhale it! It’s not dangerous or anything, but for some reason it’s really good at making you cough.

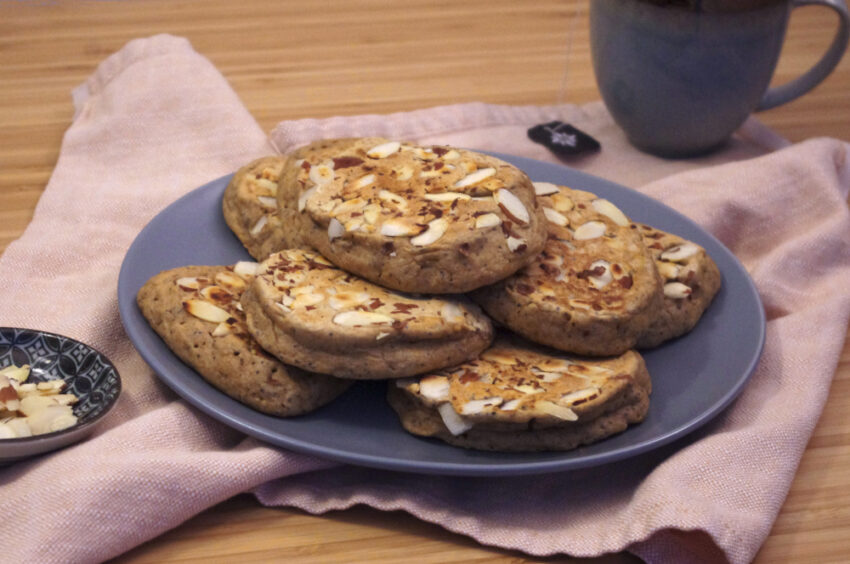
Almond-Poppy Seed Pancakes

almond poppyseed pancakes

One of the bakeries I used to work at had a rotating schedule of muffin flavors, and the almond-poppy seed always seemed to be polarizing. People would either order them reluctantly only if no other flavor was available, or they were the kind of person who only ever came on poppy-seed days. Personally, I’m a fan of this flavor combo, and if you are too, then this is definitely the pancake recipe for you. These almond-poppy seed pancakes are thick and puffy and lovely with syrup or lemon curd. I especially love how the sliced almonds toast up in the pan when you flip them.

Ingredients
Makes about 8 small pancakes

  • 1 cup whole wheat flour
  • 1/2 cup white flour
  • 1 1/2 tbsp granulated sugar
  • 1/2 tsp baking powder
  • 1/2 tsp baking soda
  • 1/2 tsp salt
  • 1 1/2 tbsp poppy seeds
  • 1 egg
  • 1 1/4 cup almond milk (or water)
  • 1 1/2 tsp almond extract
  • 1 tbsp oil or melted butter, plus more for the pan
  • Sliced almonds for sprinkling (about a quarter cup)

In a medium bowl, combine the flours, sugar, baking soda and baking powder, salt, and poppy seeds and whisk until combined. Then add the egg, milk, oil, and extract and whisk until smooth. The batter with be fairly thick and a little stretchy.

Heat a frying pan or griddle over medium heat, and spread some oil or butter over it. Once hot (a droplet of water should dance on the surface), add about a quarter cup of batter at a time to form 3-4 inch pancakes with a little space between them.

Sprinkle each pool of batter with some slivered almonds, and let them cook until set on top (the batter between the almonds should look matte and not wet or sticky), and the bottom is lightly golden brown. Flip them and cook on the other side until it’s golden too. Repeat with remaining batter.

Serve almond-poppy seed pancakes with maple syrup or lemon curd.

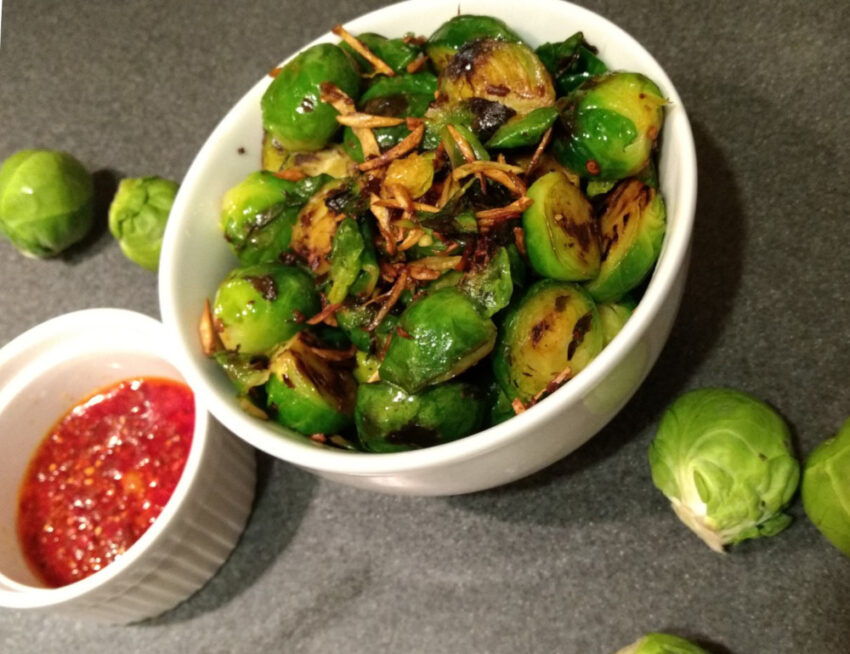
Garlic-chili oil Brussels sprouts

A simple, tasty, and attractive side dish. These garlic-chili oil Brussels sprouts are nutritious, delicious, and very quick to make!
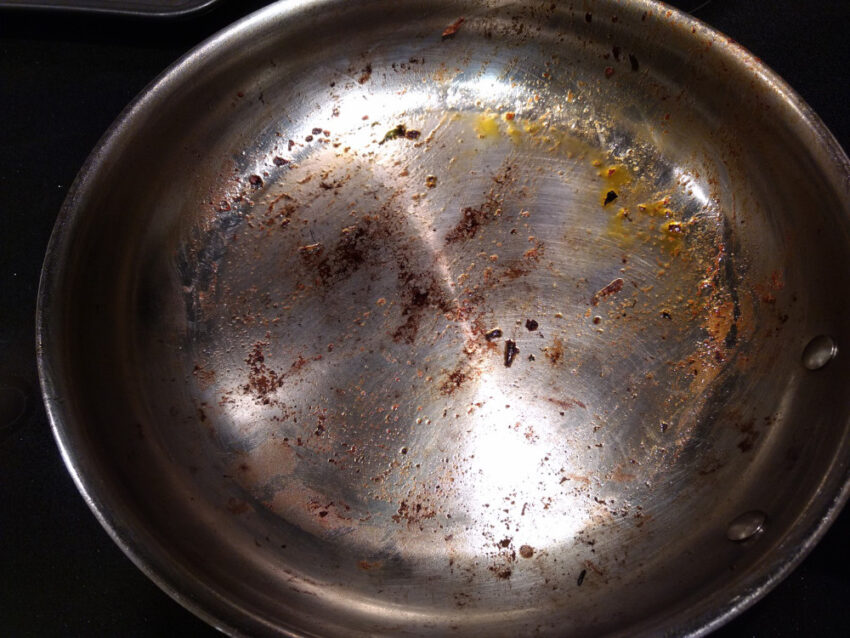
 Also makes a great accompaniment for mapo beans.

  • 1 lb Brussels sprouts
  • 3-4 cloves garlic
  • 1 tbsp vegetable oil
  • 1 tbsp chiu chow chili oil
  • 1 tbsp soy sauce
  • 2 tsp rice vinegar
  • Dash white pepper

Wash the sprouts and cut a thin slice off the bottom/stem to remove any gray/brown material. Discard the trimmings. Slice all the sprouts in half, top to bottom. Peel the garlic and cut into slivers (I do this by slicing it lengthwise and then slicing the slices lengthwise again). In a small heatproof dish, combine chili oil, soy sauce, vinegar, and white pepper.

The garlic should look like this!

Heat the vegetable oil in a medium frying pan with a lid over medium heat. When it starts to shimmer slightly, add the garlic, and cook, stirring frequently, until the garlic is all golden brown. Transfer garlic to the with the chili mixture, keeping as much of the oil in the pan as possible.

Add the sprouts to the hot pan and allow to cook without stirring for a couple of minutes. Stir, trying to get any un-seared faces turned down and let cook without stirring again. Repeat once or twice more.

Turn off the burner and toss the sprouts with the garlic mixture and then transfer immediately to a serving dish to prevent burning the sauce. Serve garlic-chili oil Brussels sprouts warm.

Deglazing

before deglazing

Deglazing sounds like fancy chef talk but is actually super simple, and it’s an essential tool to have in your toolbox.

As you pan-fry or saute things, little bits of food get stuck to the bottom of the pan. Deglazing is the process of getting them unstuck by adding liquid to the hot pan.

Why do we care? Well, that brown stuff, which is called fond, is often full of flavor, so getting it off the pan and back into your recipe can be beneficial for that reason. Also, if it stays stuck there, it can burn, which is not usually helpful flavor-wise, and also not fun to clean up later, so that’s another reason.

The details

The type of liquid you use isn’t super important, it’s just gotta be wet. For example, water, broth, wine, or tea will work (but stay away from things like milk or oil).

You want to add enough liquid that it doesn’t all boil away instantly, and it’s pretty easy to eyeball this if your recipe doesn’t specify a measurement. Just try not to add so much liquid that it stops sizzling; start with a small splash, because you can always just keep pouring. Once you add the liquid, scrape the bottom of the pan with your spatula or spoon. Et voila! Pan deglazed.

It’s easiest to see how effective this technique is with nothing else in pan, but it still works with other ingredients on top (think stir fry, not soup). Just make sure to stir and scrape everything around thoroughly, since you won’t be able to see the bottom as well.

Bonus cleaning tip!

Deglazing is usually done mid-recipe for the reasons mentioned above. However, it can also be used as a cleaning technique. If I’m done sauteing, I often take the finished food out, and then deglaze the pan with some water before turning off the heat and setting the pan aside to cool. This makes washing the pan later much easier because you’ve already loosened up any burned-on material.

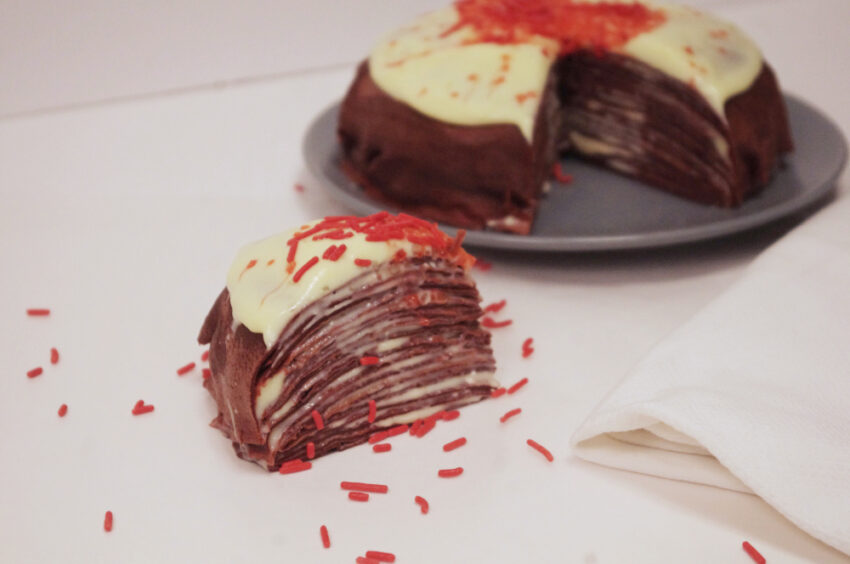
Mini Red Velvet Crepe Cake

mini red velvet crepe cake

A mini red velvet crepe cake is surely a fanciful, decadent treat! It has a firm, springy texture compared to actual cake, and the impressively thin, red layers hold a deceptively large quantity of luscious cream cheese creme patisserie.

Although a bit involved as a whole, each component can be made separately, allowing you to distribute the work over multiple days, if desired. You can prep the batter or cream in either order. Note that I strongly recommend a non-stick pan for making crepes.

Adapted from Alton Brown and Serious Eats.

Ingredients
Makes a small (~8″) cake that nonetheless easily serves 6.

For the crepes

  • 2 eggs
  • 3/4 cup milk
  • 1/2 tsp red food coloring
  • 3/4 cup water
  • 1 tbsp sugar
  • 2 tbsp unsweetened dutch cocoa
  • 1 cup flour
  • 1/4 tsp salt
  • 3 tbsp unsalted butter

For the cream cheese pastry cream

  • 3 egg yolks
  • 1/2 cup sugar
  • 2 tbsp corn starch
  • 1/8 tsp salt
  • 1 1/2 cups whole or 2% milk
  • 1/2 tsp vanilla
  • 4 oz cream cheese, cold, cut into small chunks

Prepare the crepe batter:

Melt the butter and allow to cool while you measure the other ingredients into a blender. Add the butter when no longer hot (warm is ok). Blend until completely smooth, scraping down the blender if necessary. Chill batter for at least 30 minutes or up to 2 days.

Make the pastry cream:

Prepare an ice bath by filling a large bowl a little less than halfway with ice and cold water. Set aside.

In a small/medium saucepan (the burner should be off and cold at this point), whisk together sugar, corn starch, and salt. Add the egg yolks and beat vigorously until pale and smooth, almost like soft taffy. Add the milk and vanilla.

If you have a stove that heats slowly, turn the heat to medium and whisk it smooth while it heats. If your stove heats quickly (e.g. a gas burner), turn it to low to start, and then gradually increase. The mixture should eventually begin to steam slightly, but never bubble! If you hear even a hint of a bubble, decrease the heat.

When the center of the mixture thickens enough to see path of your whisk in the cream, remove from heat immediately and whisk until it’s all thickened. It should be something like yogurt in consistency. Add half the cream cheese and whisk in. Transfer mixture to heatproof bowl and add the remaining cream cheese. Whisk until there are no more lumps.

Set bowl into the ice bath and whisk until it cools. When cooler than room temp, press a piece of cling film down onto the surface of the cream and over the edges of the bowl (to prevent a skin from forming). Chill until ready to use (up to a few days).

Cook crepes:

When you’re ready to use the batter, stir briefly to combat any separation that has occurred in the fridge. Heat a small (I used an 8-inch) non-stick pan over medium/medium-low heat. Coat lightly with just a little oil or butter. Take a deep breath and accept that the very first crepe will probably suck.

Hold the pan at an angle in one hand while you pour a small about of batter (think a couple tbsp) into the high side of the pan. Quickly swirl the batter around so that it coats the bottom of the pan in a circular shape. You want a nice even coat, but just about as thin as you can get away with. Set the pan back on the burner and let cook until the edges are dry and the middle is matte (see photos below).

Use a thin spatula to flip, and let cook a few more moments, until the sizzling gets noticeably quieter. If you find it too difficult to flip without tearing at this state, cook slightly longer, and look for the edge of the crepe to separate from the pan (a good indicator, although it may not happen every single crepe). Don’t worry about the crepe being a little too crisp at the edges–if you stack them on a plate together as they come off the pan they will become more pliable again.

Transfer to a plate. Re-grease the pan if needed. Repeat with the rest of the batter (unless you need to save some for the optional step below, in which case I recommend doing that sooner rather than later so you have plenty of batter).

Optional step: you can do all the crepes the same size and that will make a great crepe cake. However, if you would like a smooth outer surface, you will need to make one larger crepe to drape over the outside. To make this, heat a larger non-stick pan, lightly grease, and make a crepe just like the smaller ones (only using a bit more batter). Set this crepe aside for the end.

Assemble

To assemble your mini red velvet crepe cake, place a crepe flat on a small plate. Use a spoon or offset spatula to spread a thin layer of the pastry cream over the whole crepe. Continue layering like this until you have used all but one crepe (the big one, if you chose to make it). Place the final crepe over the pile, smoothing the edges over the sides if it’s a big one. Spread or pipe a thicker layer of cream over and decorate with red sprinkles or a dusting of cocoa, if desired.

Your mini red velvet crepe cake is complete! You serve it immediately or cover it and keep it chilled until later, but it is best served the same day.

Mushrooms with Black Garlic & Greens

These mushrooms with black garlic come together in little more than a half hour and have a wonderfully complex flavor profile. Chewy umami and fresh greens, tied together with tangy black garlic and vinegar. Plus cheese and cubes of toast. Did I mention how delicious? How easy? So just go buy a huge pile of mushrooms and make it ASAP. As a quick warning, it does look a little insubstantial when it’s finished, but you’ll discover upon eating that it’s actually plenty filling. Serve for dinner or brunch.

Adapted slightly from Smitten Kitchen (where it was adapted slightly from the Seven Spoons Cookbook).

Ingredients
Serves 2-3 as a main dish–would also make a great side.

  • About 1 lb assorted mushrooms (I used about equal proportions shiitake, button, pink oyster, and cremini)
  • 1 small bunch of kale or chard
  • 1 lobe of a shallot
  • 4-5 cloves black garlic (about 10 grams)
  • 1 1/2 tbsp salted butter
  • 1 1/2 tbsp olive oil
  • 2 slices of sourdough or crusty french bread
  • 1 tbsp apple cider vinegar
  • 1/4 tsp salt (1/2 if using unsalted butter)
  • 3/4 tsp red pepper flakes or to taste
  • Freshly ground black pepper
  • 4-5 oz cheese good for melting (I used Beechers)

Wash and trim the mushrooms. Towel mostly dry or allow to air dry. Cut into thick slices or tear into bite-sized pieces. Peel and mince the shallot and black garlic (keep separate). Wash the greens, remove the tougher parts of the stems, and tear into bite sized pieces.

In a large pan, heat the butter and 1 tbsp of the olive oil. When it’s hot, add the mushrooms, all at once. Cook, stirring occasionally, until the mushrooms have shrunk to half their size and there is little to no water at the bottom of the pan (around 8 minutes). Meanwhile toast the bread. and slice the cheese (bite-sized pieces for softer cheeses, and thin slices for harder ones).

Add the shallot to the pan, and stir for about a minute. Add the vinegar, red pepper, black pepper, and salt and stir well. Scrape the mushrooms to the edges of the pan, add the remaining half a tablespoon of oil into the center, and add the kale and black garlic. Stir thoroughly, making sure to break up any clumps of garlic. Cook for a few more minutes, stirring frequently, until the greens are bright and softened.

Tear the bread into bite sized pieces and distribute the chunks evenly over the mushroom mixture. Layer on the cheese, again, more or less evenly distributed over the rest. Reduce pan to medium low and cover the pan (you can use foil if it doesn’t have a lid). Cook until the cheese has melted and then serve.

My partner and I followed Deb Perelman‘s lead and ate this straight from the pan with a fork, but it would also be very good plated up with a poached egg on top, if you wanna get all fancy.