
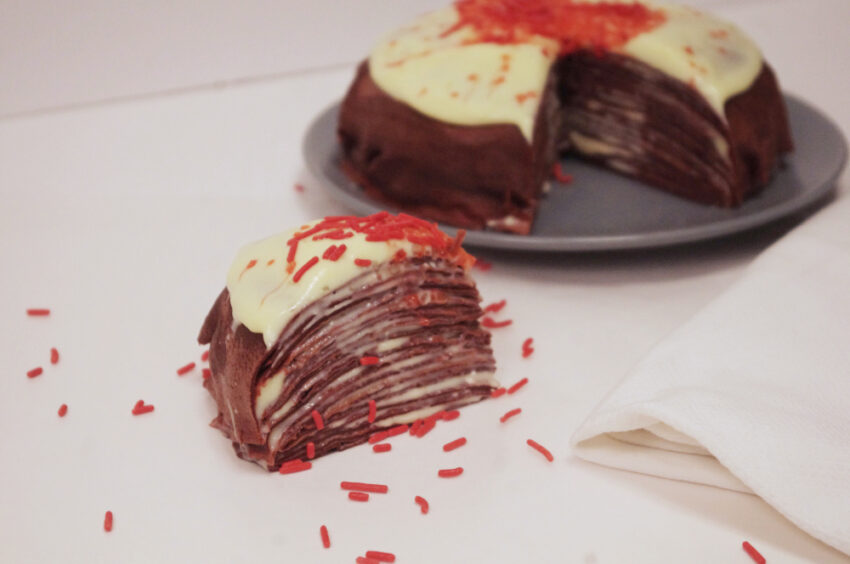
A mini red velvet crepe cake is surely a fanciful, decadent treat! It has a firm, springy texture compared to actual cake, and the impressively thin, red layers hold a deceptively large quantity of luscious cream cheese creme patisserie.
Although a bit involved as a whole, each component can be made separately, allowing you to distribute the work over multiple days, if desired. You can prep the batter or cream in either order. Note that I strongly recommend a non-stick pan for making crepes.
Adapted from Alton Brown and Serious Eats.
Ingredients
Makes a small (~8″) cake that nonetheless easily serves 6.
For the crepes
- 2 eggs
- 3/4 cup milk
- 1/2 tsp red food coloring
- 3/4 cup water
- 1 tbsp sugar
- 2 tbsp unsweetened dutch cocoa
- 1 cup flour
- 1/4 tsp salt
- 3 tbsp unsalted butter
For the cream cheese pastry cream
- 3 egg yolks
- 1/2 cup sugar
- 2 tbsp corn starch
- 1/8 tsp salt
- 1 1/2 cups whole or 2% milk
- 1/2 tsp vanilla
- 4 oz cream cheese, cold, cut into small chunks
Prepare the crepe batter:
Melt the butter and allow to cool while you measure the other ingredients into a blender. Add the butter when no longer hot (warm is ok). Blend until completely smooth, scraping down the blender if necessary. Chill batter for at least 30 minutes or up to 2 days.
Make the pastry cream:
Prepare an ice bath by filling a large bowl a little less than halfway with ice and cold water. Set aside.
In a small/medium saucepan (the burner should be off and cold at this point), whisk together sugar, corn starch, and salt. Add the egg yolks and beat vigorously until pale and smooth, almost like soft taffy. Add the milk and vanilla.
If you have a stove that heats slowly, turn the heat to medium and whisk it smooth while it heats. If your stove heats quickly (e.g. a gas burner), turn it to low to start, and then gradually increase. The mixture should eventually begin to steam slightly, but never bubble! If you hear even a hint of a bubble, decrease the heat.
When the center of the mixture thickens enough to see path of your whisk in the cream, remove from heat immediately and whisk until it’s all thickened. It should be something like yogurt in consistency. Add half the cream cheese and whisk in. Transfer mixture to heatproof bowl and add the remaining cream cheese. Whisk until there are no more lumps.
Set bowl into the ice bath and whisk until it cools. When cooler than room temp, press a piece of cling film down onto the surface of the cream and over the edges of the bowl (to prevent a skin from forming). Chill until ready to use (up to a few days).


Cook crepes:
When you’re ready to use the batter, stir briefly to combat any separation that has occurred in the fridge. Heat a small (I used an 8-inch) non-stick pan over medium/medium-low heat. Coat lightly with just a little oil or butter. Take a deep breath and accept that the very first crepe will probably suck.
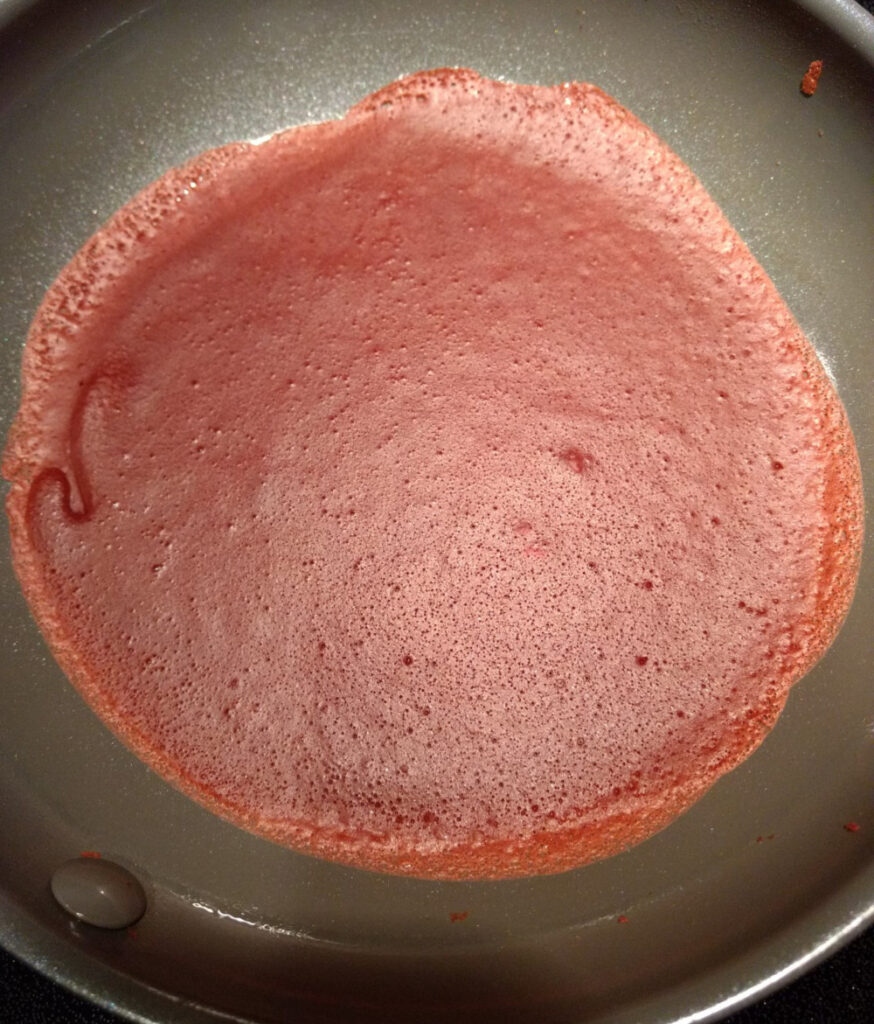
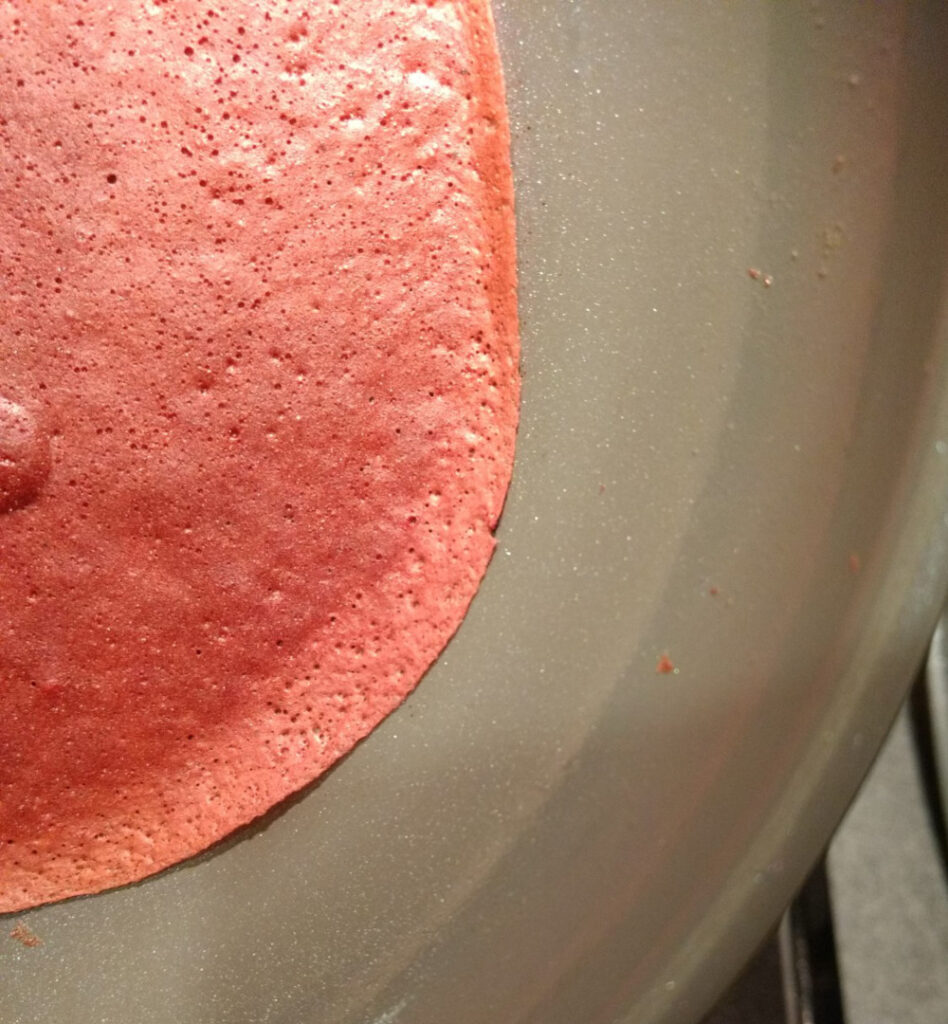
Hold the pan at an angle in one hand while you pour a small about of batter (think a couple tbsp) into the high side of the pan. Quickly swirl the batter around so that it coats the bottom of the pan in a circular shape. You want a nice even coat, but just about as thin as you can get away with. Set the pan back on the burner and let cook until the edges are dry and the middle is matte (see photos below).
Use a thin spatula to flip, and let cook a few more moments, until the sizzling gets noticeably quieter. If you find it too difficult to flip without tearing at this state, cook slightly longer, and look for the edge of the crepe to separate from the pan (a good indicator, although it may not happen every single crepe). Don’t worry about the crepe being a little too crisp at the edges–if you stack them on a plate together as they come off the pan they will become more pliable again.
Transfer to a plate. Re-grease the pan if needed. Repeat with the rest of the batter (unless you need to save some for the optional step below, in which case I recommend doing that sooner rather than later so you have plenty of batter).
Optional step: you can do all the crepes the same size and that will make a great crepe cake. However, if you would like a smooth outer surface, you will need to make one larger crepe to drape over the outside. To make this, heat a larger non-stick pan, lightly grease, and make a crepe just like the smaller ones (only using a bit more batter). Set this crepe aside for the end.
Assemble
To assemble your mini red velvet crepe cake, place a crepe flat on a small plate. Use a spoon or offset spatula to spread a thin layer of the pastry cream over the whole crepe. Continue layering like this until you have used all but one crepe (the big one, if you chose to make it). Place the final crepe over the pile, smoothing the edges over the sides if it’s a big one. Spread or pipe a thicker layer of cream over and decorate with red sprinkles or a dusting of cocoa, if desired.
Your mini red velvet crepe cake is complete! You serve it immediately or cover it and keep it chilled until later, but it is best served the same day.